Introduction to Appwrite cloud functions - writie your first cloud function with nodejs
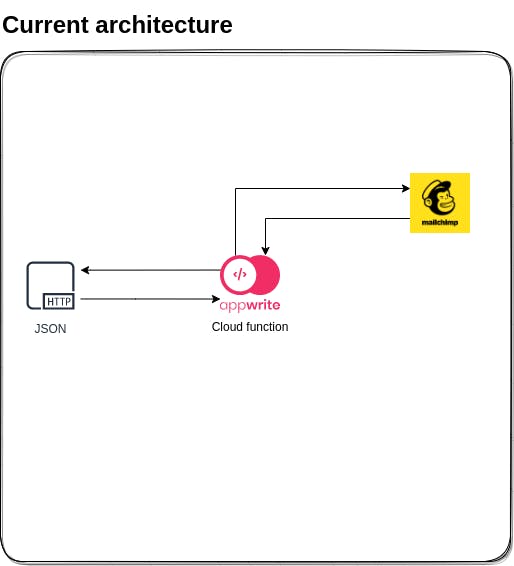
In this post we'll discuss how to communicate with mailchimp through an appwrite cloud function
Hey everyone 👋,
in this post we'll discuss how to communicate with mailchimp through an appwrite cloud function.
What is Appwrite?
Appwrite in an opensource and self-hosted Backend as a Service solution. It comes with a set of easy-to-use and integrate REST API. Some built-in functionality:
- Database module: CRUD operation with access control
- Storage: uploading files
- Authentication: ready to use, with different oauth providers, email confirmations etc
- Console: to track your api requests and manage different project in one place
- Geo & location: detect users location and utilize geo related data
- Privacy: you are owning your own data inside your own self hosted environment
- Functions: if these are above is not enough for your needs you can extend the functionality via cloud functions
Goals
We are going to call a mailchimp function through our cloud function to demonstrate how flexible it is. First I'll demonstrate using Appwrite console - but of course our goal is to create a tiny example app. Mailchimp is an email marketing platform with many-many great features.

Cloud functions
With cloud functions you can extend Appwrite existing functionality with your own code. Appwrite can execute these functions on Appwrite system events like account creation, or database operations. You could potentially set up a CRON schedule or trigger them manually in Appwrite console or from an HTTP request.
Cloud functions runs in a secure isolated Docker container, it also supports multiple run time environments so you can write your custom code in your favorite coding language.
Setting up mailchimp
To communicate with mailchimp through appwrite we need two things:
- API key
- List id to which we are going to subscribe
To get the API key navigate into account -> extras -> API keys and you can create you very own API key.
To grab the ListId navigate to Audience -> All contacts -> Settings -> Audience name and defaults from here you can grab the Audience ID. This is the list that our users can subscribe into, keep that in mind.
Writing and executing the cloud function
We are going to use mailchimp-api-v3 to simply use mail chimp's API, the rest is just parsing and using the API 😀
const Mailchimp = require('mailchimp-api-v3');
const listId = process.env.APPWRITE_MAILCHIMP_LIST_ID;
const apiKey = process.env.APPWRITE_MAILCHIMP_API_KEY;
const mailchimp = new Mailchimp(apiKey);

const email = JSON.parse(process.env.APPWRITE_FUNCTION_DATA)['email'];

const body = {
    email_address: email,
    status: 'subscribed'
};

mailchimp.post({
    path: `/lists/${listId}/members`,
    body
}).then(console.log).catch((err) => {
    console.error(err.detail);
});
After our code is "ready to be deployed" we can tar' it up and upload to appwrite.
You can find the example code and further instructions here: github.com/appwrite/demos-for-functions/tre..
Firing up from appwrite console manually
After you've navigated to appwrite console go to the functions menu item, click Add function here name can be anything you want, just make sure you choose Node.js 16.0 as runtime.
While following the instructions in the example repo, you'll end up with a code.tar.gz file, this is your cloud function's code with all its dependency. We'll need to upload this into appwrite console:
- Click on the Deploy Tag
- Choose the manula tab
- Our command is:
node index.js- this is the entry for the script - Lastly upload the
code.tar.gzfile
Before we can activate our function we need to set up the environment variables which we've gathered in the previous steps. The keys can be guessed from the example code 😀, but for the API the key is: APPWRITE_MAILCHIMP_API_KEY and for the listId: APPWRITE_MAILCHIMP_LIST_ID.
After the keys are set now we can activate the function and we can see an example output.
We could fire up our function on different events from appwrite, for example we could collect our users emails on account.create, of course that would be a little too pushy, but with the provided events we could do all sorts of automation.
This function needs an input to run, just to demonstrate let's assume a new subscriber as the following json input:
{"email":"test@email.io"}
After you've executed you can see the response from mailchimp in the output and the errors in the error tab.
Closing thoughts
As you can see with appwrite functions we can failry easily communicate with other services for example with mailchimp to subscribe a newsletters.
I hope you've enjoyed this small post about appwrite cloud function ^^
